
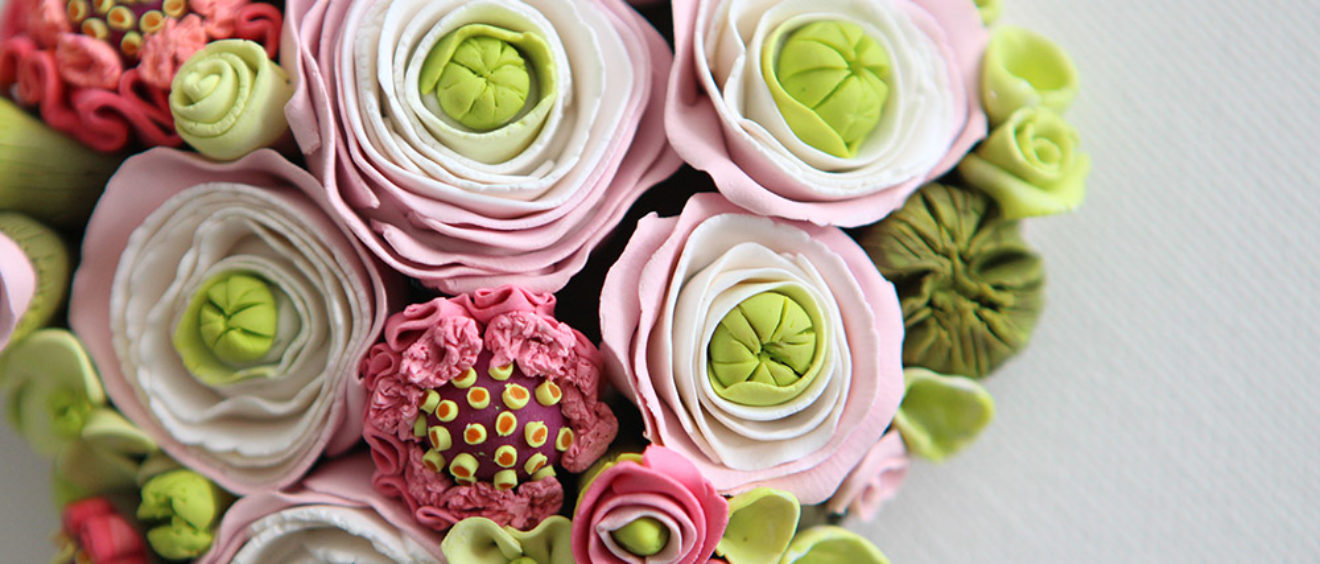
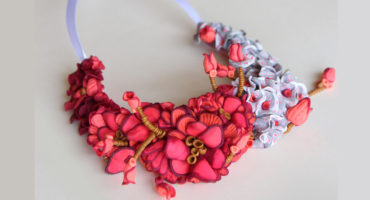
Floral Arrangement – The Tutorial
Regardless of the season we’re at, flowers always lift my spirit. And yes! even though it’s fall in the northern hemisphere of the world, yellow and orange roses are still incredibly beautiful.
In other words, this tutorial will enable you to create a beautiful floral arrangement ANY time of the year!
This particular design is a favorite among my bridal clients. Light on the chest and beautiful to look at. The making of this piece is a bit tedious and repetitive but surprisingly simple.
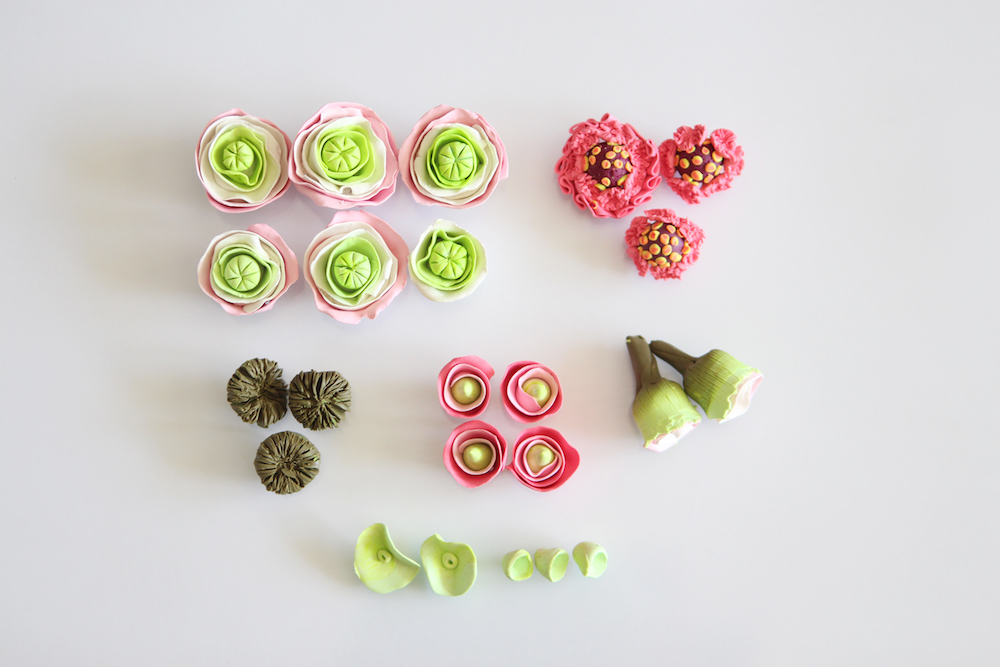
We’ll be creating:
- Three types of roses (large, medium, tiny ones)
- A wild flower
- And some greenery to create a lovely floral arrangement.
This tutorial will not include how-to steps for many basic polymer-clay techniques that you will hopefully be familiar with. To follow along, you’ll need to know how to make canes, create custom colors, make a skinner blend, texturize, be comfortable using a razor blade and a handful of shaping tools.
Let’s get started!
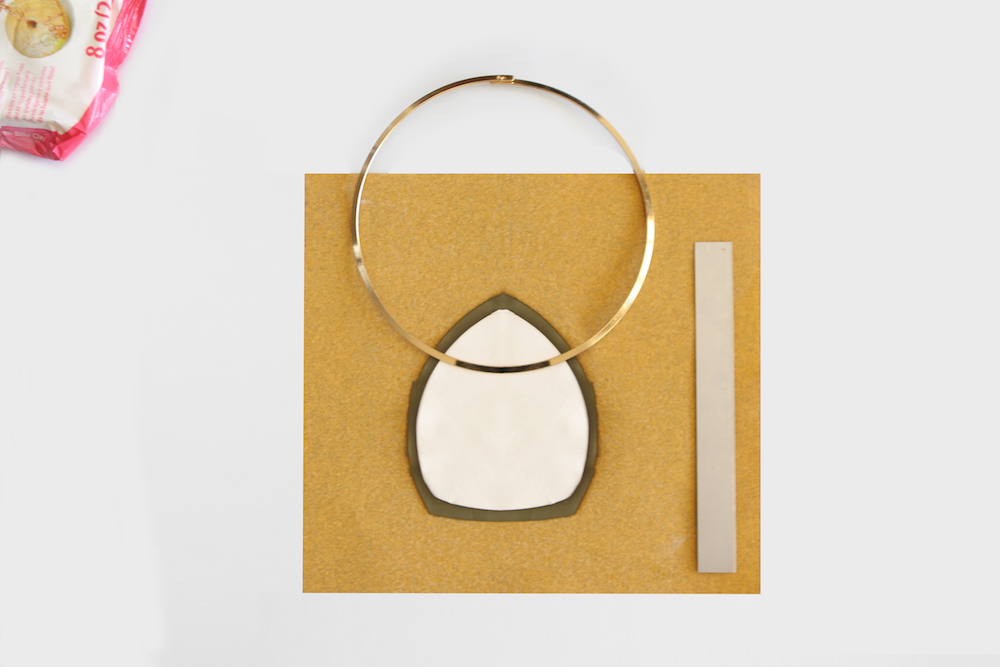
Building the Base:
STEP1:
Run ultralight polymer through the thickest setting of your pasta machine. Cut and form a rounded diamond shape. Run green polymer through a thin setting, texture with sanding paper. Place it under the white polymer and cut around it.
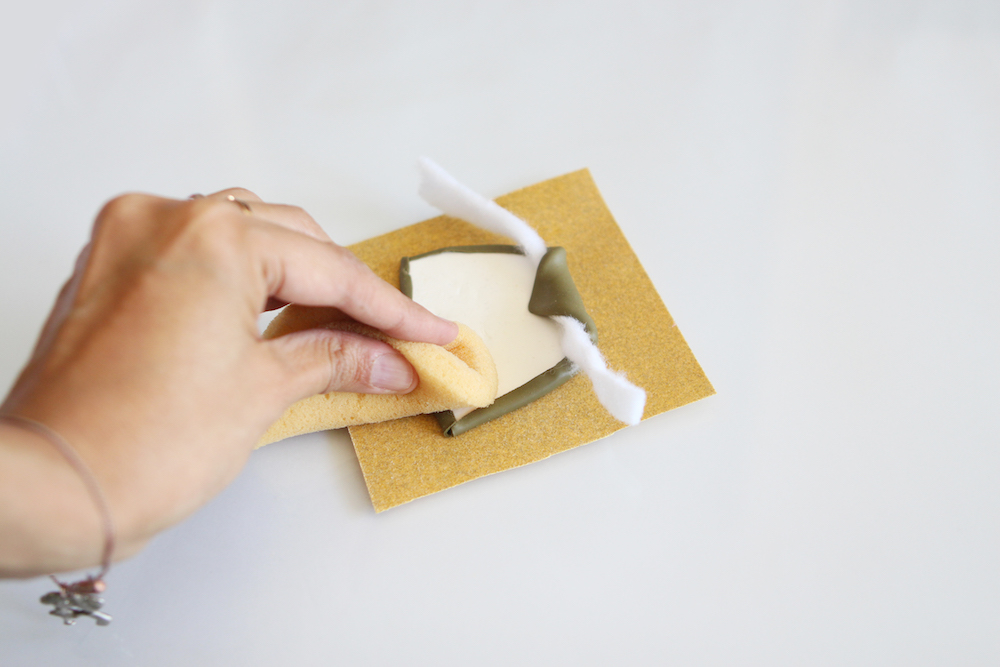
STEP2:
Use a sponge to softly cover the edges of white clay with green clay, while also forming the loop. Insert a piece of fiberfill to hold the shape of the loop. Set aside.
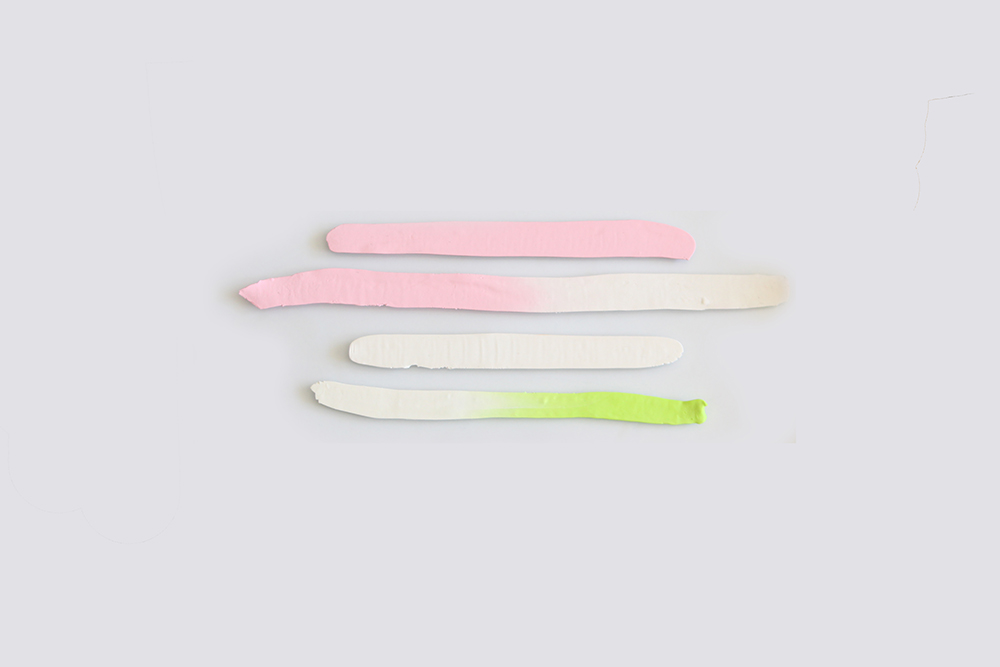
Building our largest roses:
STEP3:
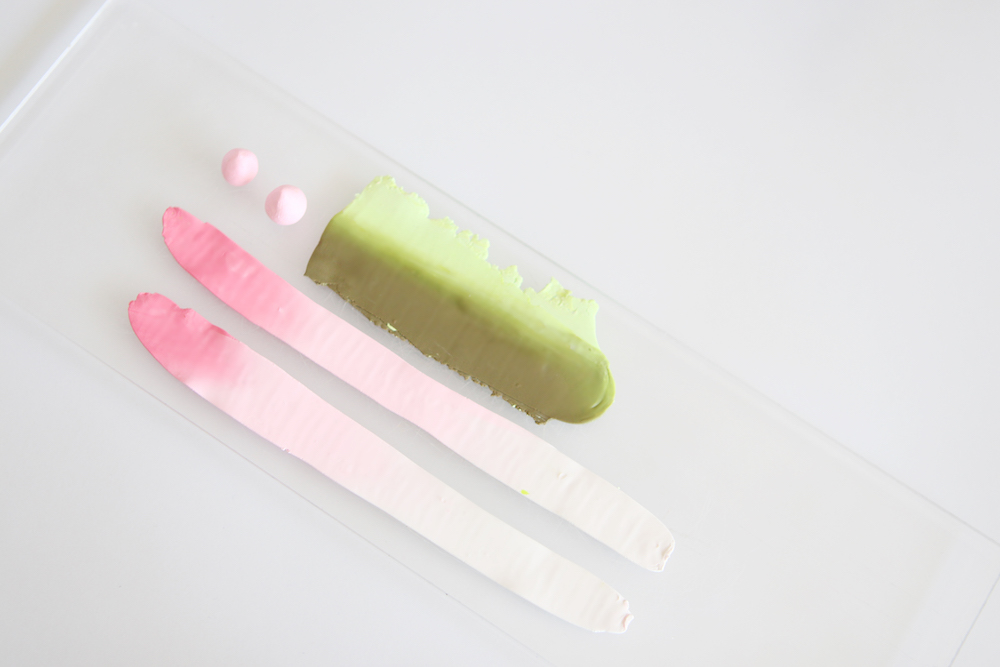
Create two thin skinner blends in white-green and white-pink, each up to 8mm high and 8cm long. Create two strips in just white and pink. Keep all strips purposefully rough and uneven. Roses are beautiful because they’re imperfect.
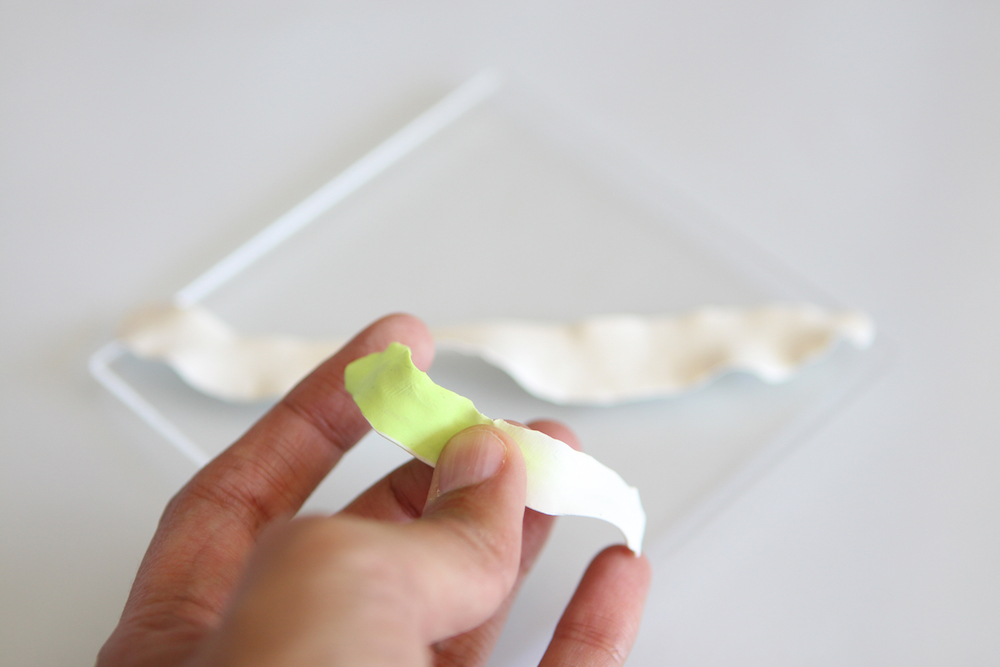
STEP4:
Hold a strip (layer) and squeeze from left to right one of the edges. This will make that edge “curled”. Repeat with all 4 layers.
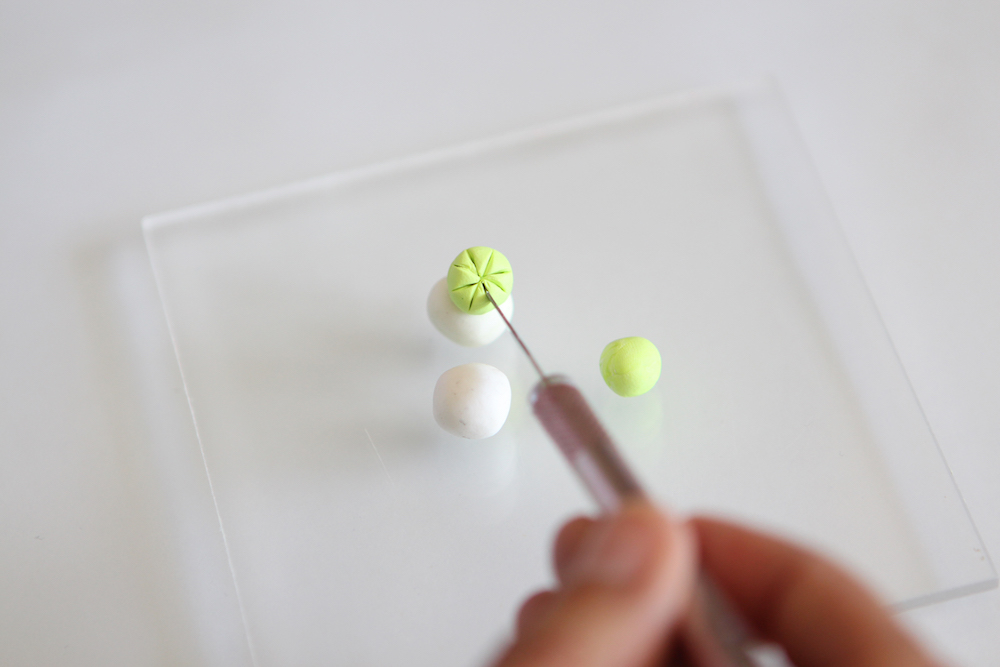
STEP5:
Make a small bead with ultralight polymer, and another (slightly smaller) bead with light green clay. Place the green bead over the white one. Use a razor blade to cut through the green bead as shown in the image.
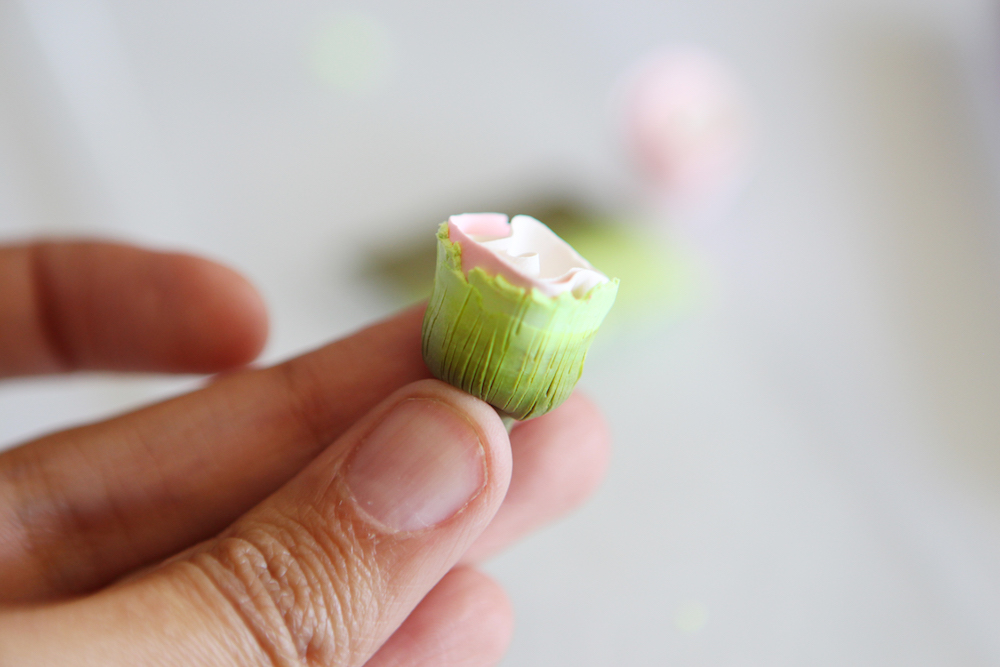
STEP6:
Hold the green and white double-bead on one hand. Grab the white-green strip, and (starting with the green side) begin circling the beads until it ends.
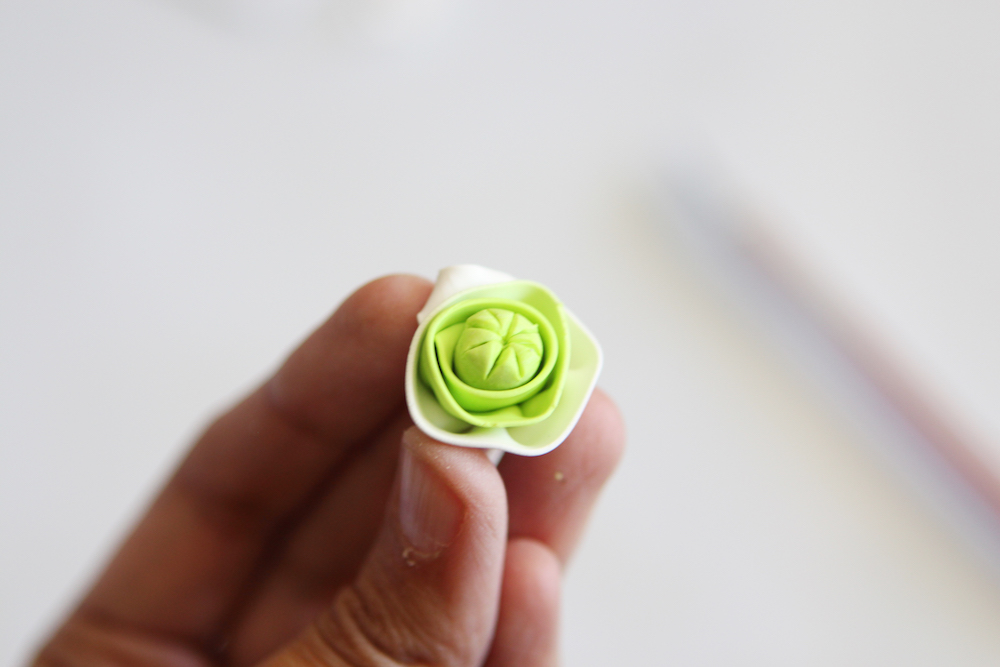
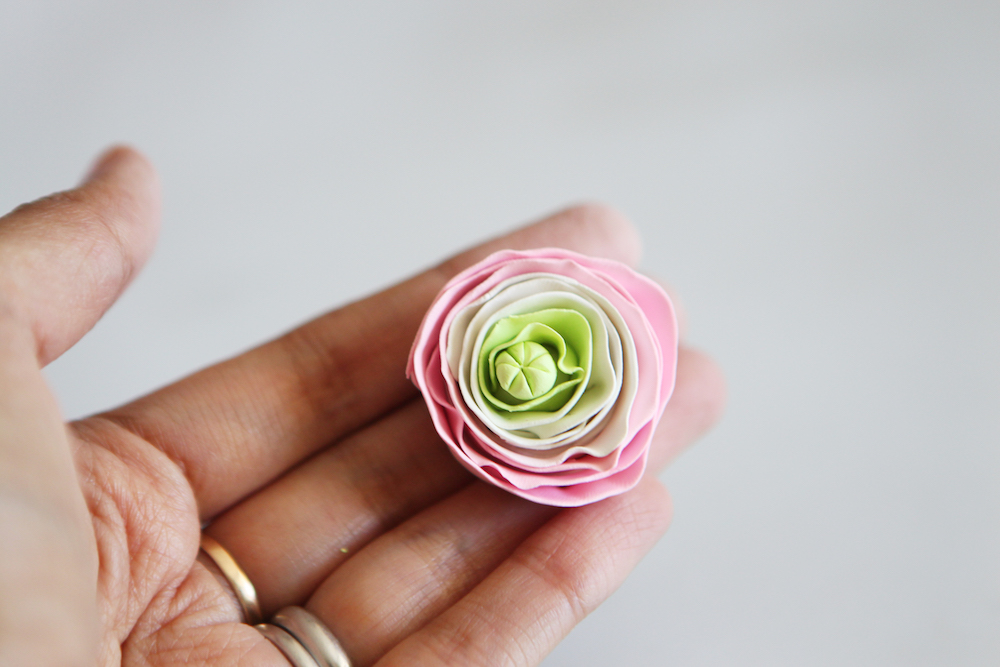
STEP7:
Grab the white strip and continue circling the beads until it ends. Repeat next with the white-pink strip, followed by the pink strip. This will complete your first rose.
Building our Wild Flowers
STEP8:
Create a tiny cane (1.5mm in diameter) with hot pink and strong yellow. Then cut thin and tiny slices. Leave aside.
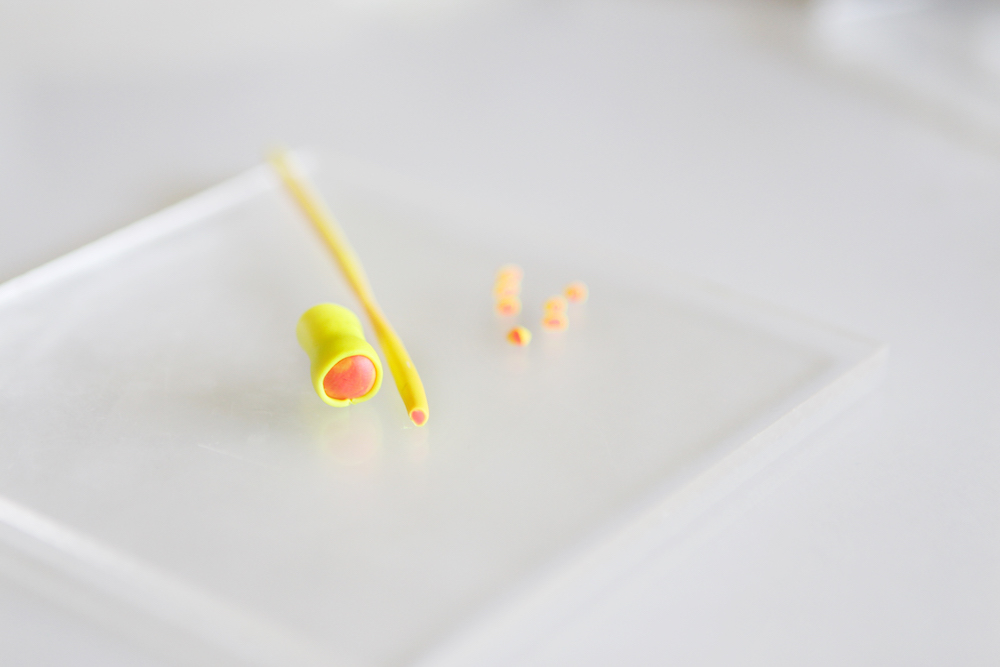
STEP9:
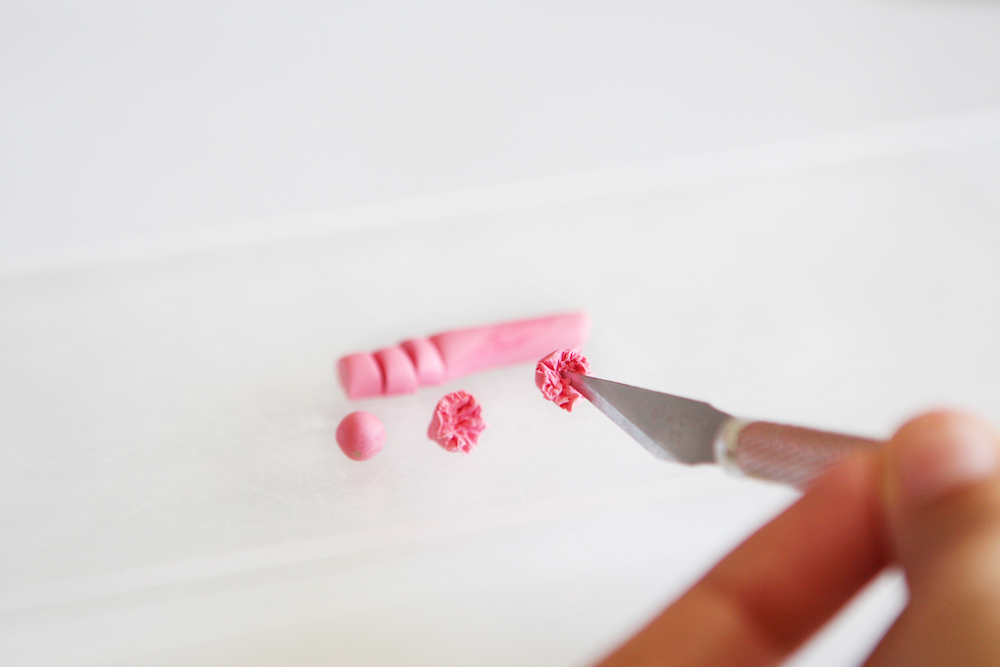
To make the petals, create an opaque-pink colored cane (4mm in diameter). Cut the cane in slices and make small beads. Hold one bead, and using a razor blade gently slice the bead from the middle outward. Repeat with each bead.
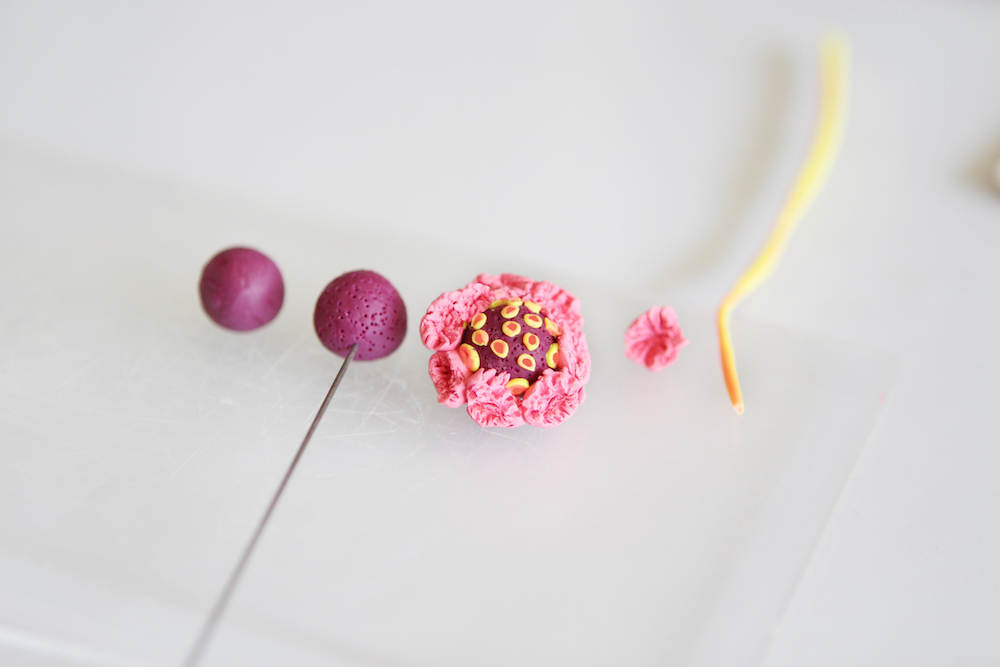
STEP10:
After making a cherry colored bead we can assemble the flower. Gently place several tiny yellow-pink slices on top, and then surround the cherry bead with the opaque-pink “petals”.
Building our medium-size roses
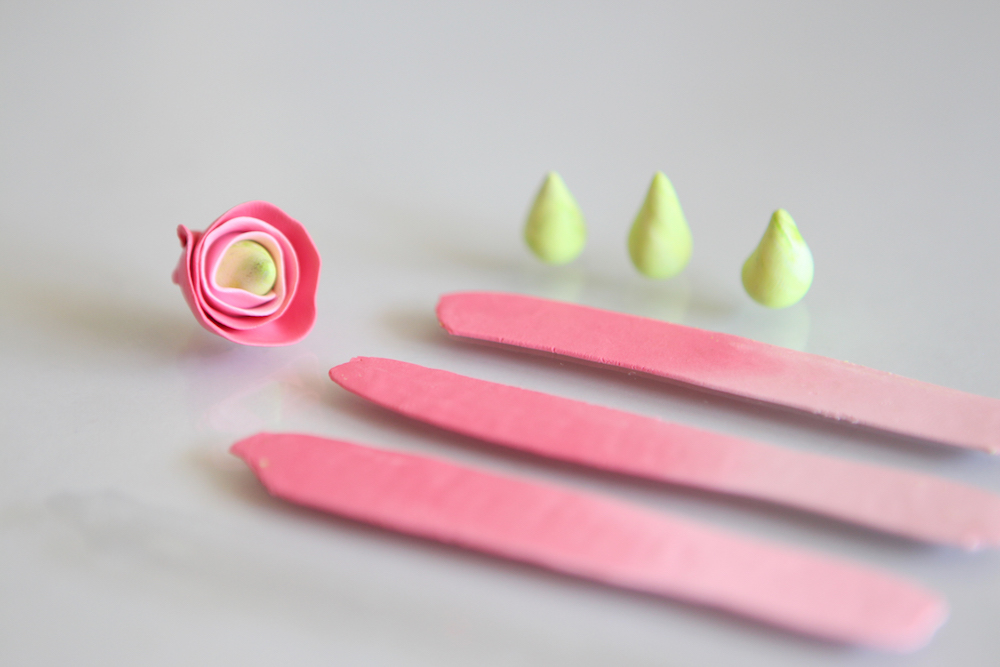
STEP11:
Using similar steps as for “rose#1”, create two strips of thin pink-white skinner blends, one strip of light and dark green skinner blend, and two small pink beads that you then manually shape as drops.
STEP12:
After curling the edges of both pink-white strips, hold the first drop and start circling it with one of the strips. Repeat with second drop. Cut the green strip in half. With a razor blade, slash each half up and down as shown.

STEP13:
Hold the first small rose in one hand. Grab the first half of the sliced green strip and circle it around the small rose. Gently form a stem with the darkest portion of the green strip. Repeat the same for the second small rose.
Building out tiny roses
STEP14:
Using similar steps as for our large and medium-size roses, create three strips of thin pink and dark pink skinner blends and three small green beads that you then manually shape as drops. Curl all three strips. Circle each strip around each drop.
Creating Dark Greenery
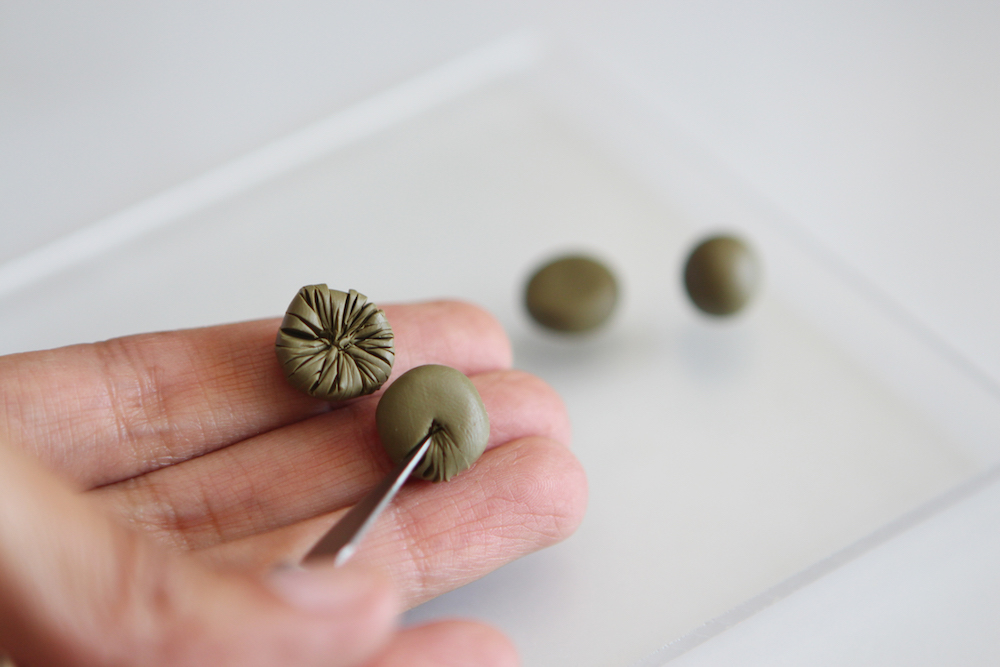
STEP15:
Make 3 medium beads with dark green clay. Flatten each bead a little bit. Hold one flatten bead in one hand. Using a razor blade and starting in the middle, gently slice the bead outward all around. Repeat with other two beads.
Creating lighter greenery
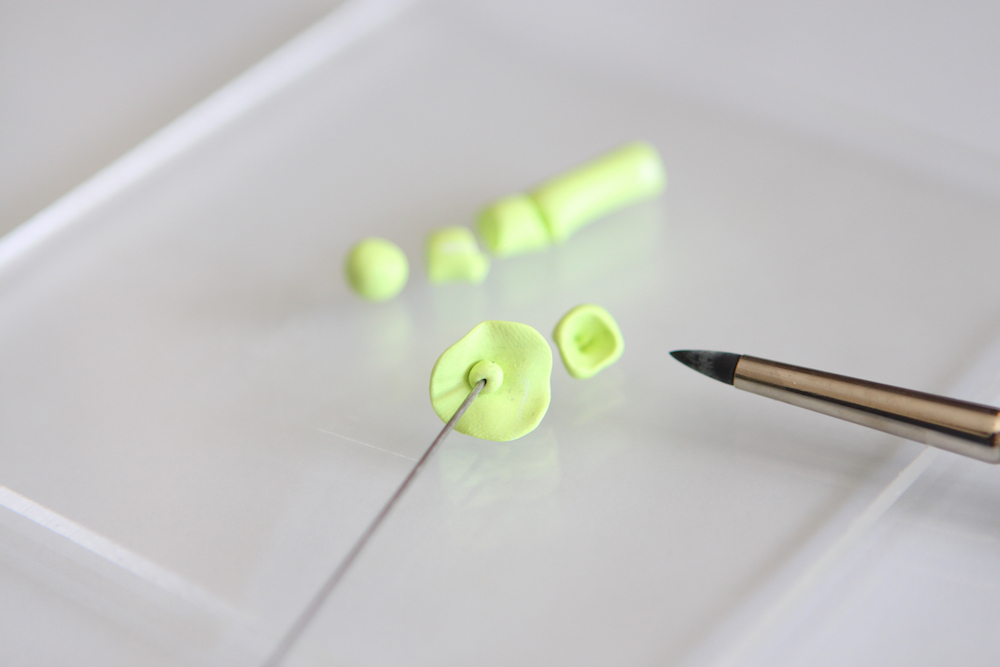
STEP16:
Make a simple light green cane. Cut it in several pieces. Make small beads with each piece. Hold a bead and gently pierce a large hole in the middle. Hold another bead, flatten it and place a tiny bead in the middle.
Repeat!
STEP17:
Repeat the prior steps to make at least five medium and large pieces, three wild flowers, two medium-size roses, four tiny ones and a handful of greenery elements to start with.
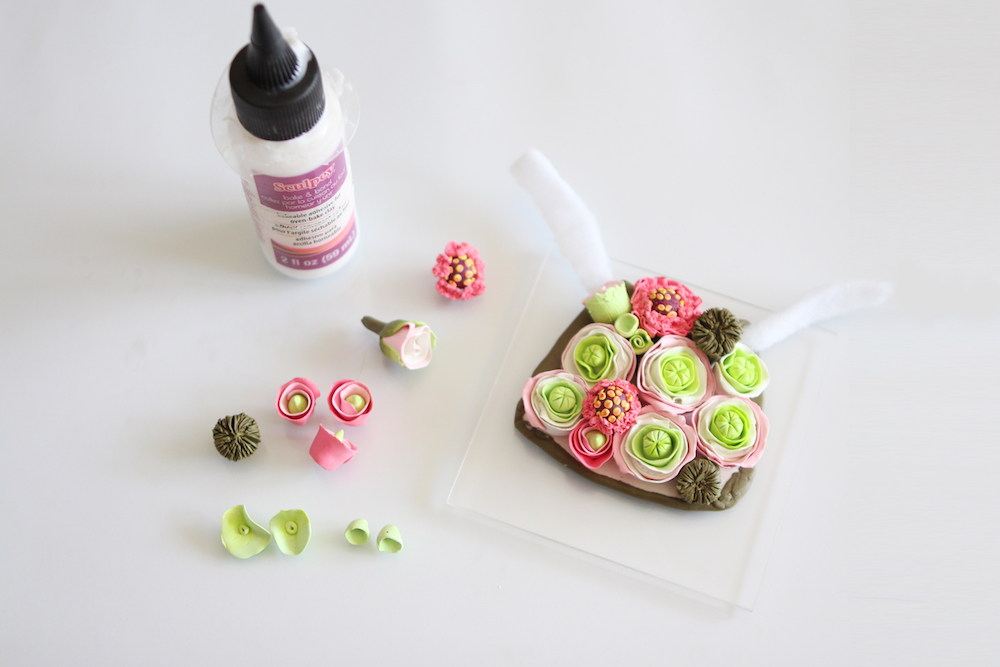
Assemble
STEP18:
Bring the “base” back to your work area. Add a thin layer of polymer clay glue (bake and bond) all over it. Then, begin assembling and composing your flower arrangement, starting with the largest pieces in the middle.
Final Details
STEP19:
Create more greenery elements to fill all the spaces in between the main elements. Gently and little by little fill all the holes keeping and eye for balance and to avoid over-saturation.

Bake and Finish
STEP20:
After completing your flower arrangement you are ready to bake it at the necessary temperature according to the brand of clay you’re working with. When done, let it cool and insert gently its metal collar.
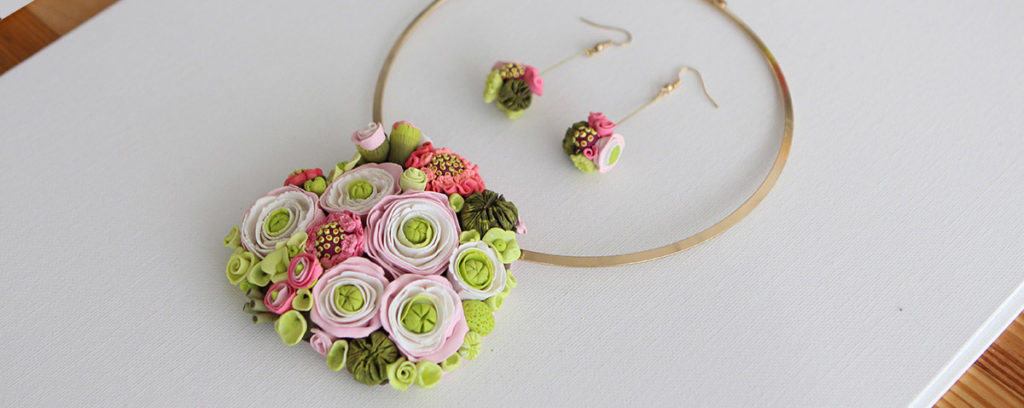
STEP21: Ready to shine!
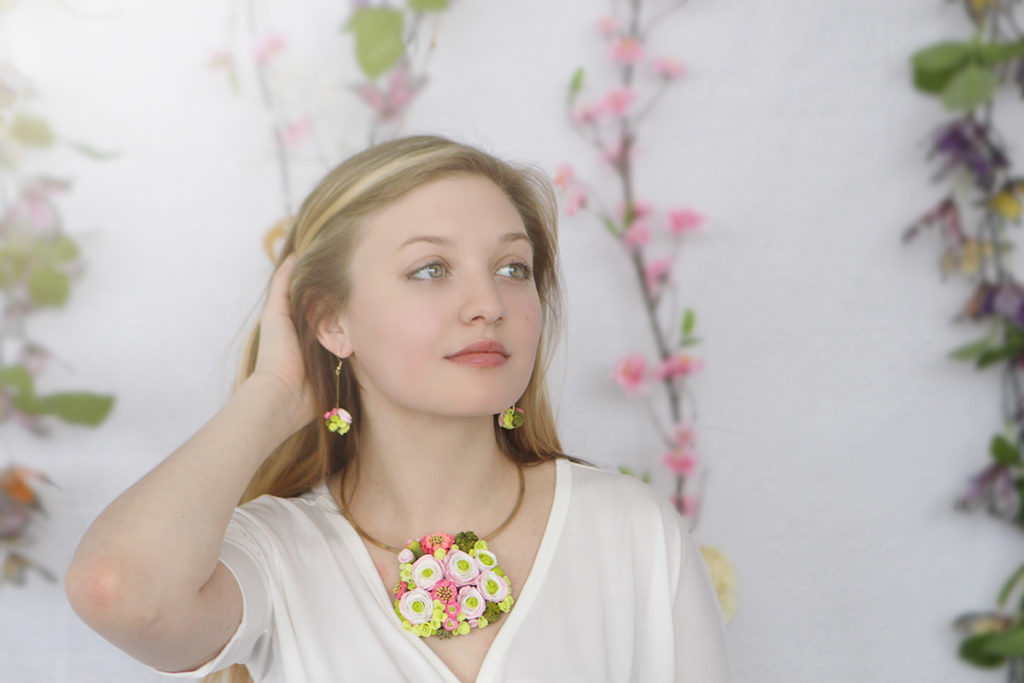
If you so feel inspired, I’d LOVE for you to give it a try!
NOTE: If you are a beginner, you may realize quickly that each step is more complex than it looks, as it encompasses lots of small steps. This is a tutorial that can be executed with ease if you have mid-level experience with this medium. Having said that, reach out anytime if you have any questions at all 🙂
THANK YOU SO MUCH FOR VISITING!
Stay well, stay happy and stay healthy. I’ll be in touch in a month!

Our recent blog posts!
Polymer Clay: A New Generation
It’s SO good to say happy Tuesday again!! First, let me briefly welcome the new friends and subscribers that are receiving […]
Read More ›
Articulating myself and VeruDesigns
Hello beautiful!! Today is not only a very very personal post, but also magical and uniquely special for me. Yesterday, my little […]
Read More ›
Architectural Romance - New Collection!
Happy Tuesday everyone! After having been working for a little over a month on our floral jewelry (which you can […]
Read More ›
Such a pretty adornment!
Will you tell us about your third business?
As if you weren’t inspirational enough already!
Dearest Rivky – I will for sure! I ran a bit out of time, but I will absolutely share it in my next newsletter. Thank you for the lovely words <3
Thank you Veruschka for answering all my questions in such a detailed manner.
You are wonderful!
You’re very welcome Claudia! I’d love to see how it turn out!
Looks easy but it is NOT! I do have a few questions Veruschka. Just sent you an email
So wonderful! I’m absolutely trying it!
Beautiful!!! Can’t wait to try this!
Let me know if you have any questions, Sue! I’m here to help 🙂